Github Action으로 Unity Test Runner 돌리기
 Software 개발 중, Github Action과 Unity Testrunner를 통한 Code Coverage 방법
1. Github Action 생성
 본인의 Unity 프로젝트 Repository의 Actinos 탭을 눌러준다.
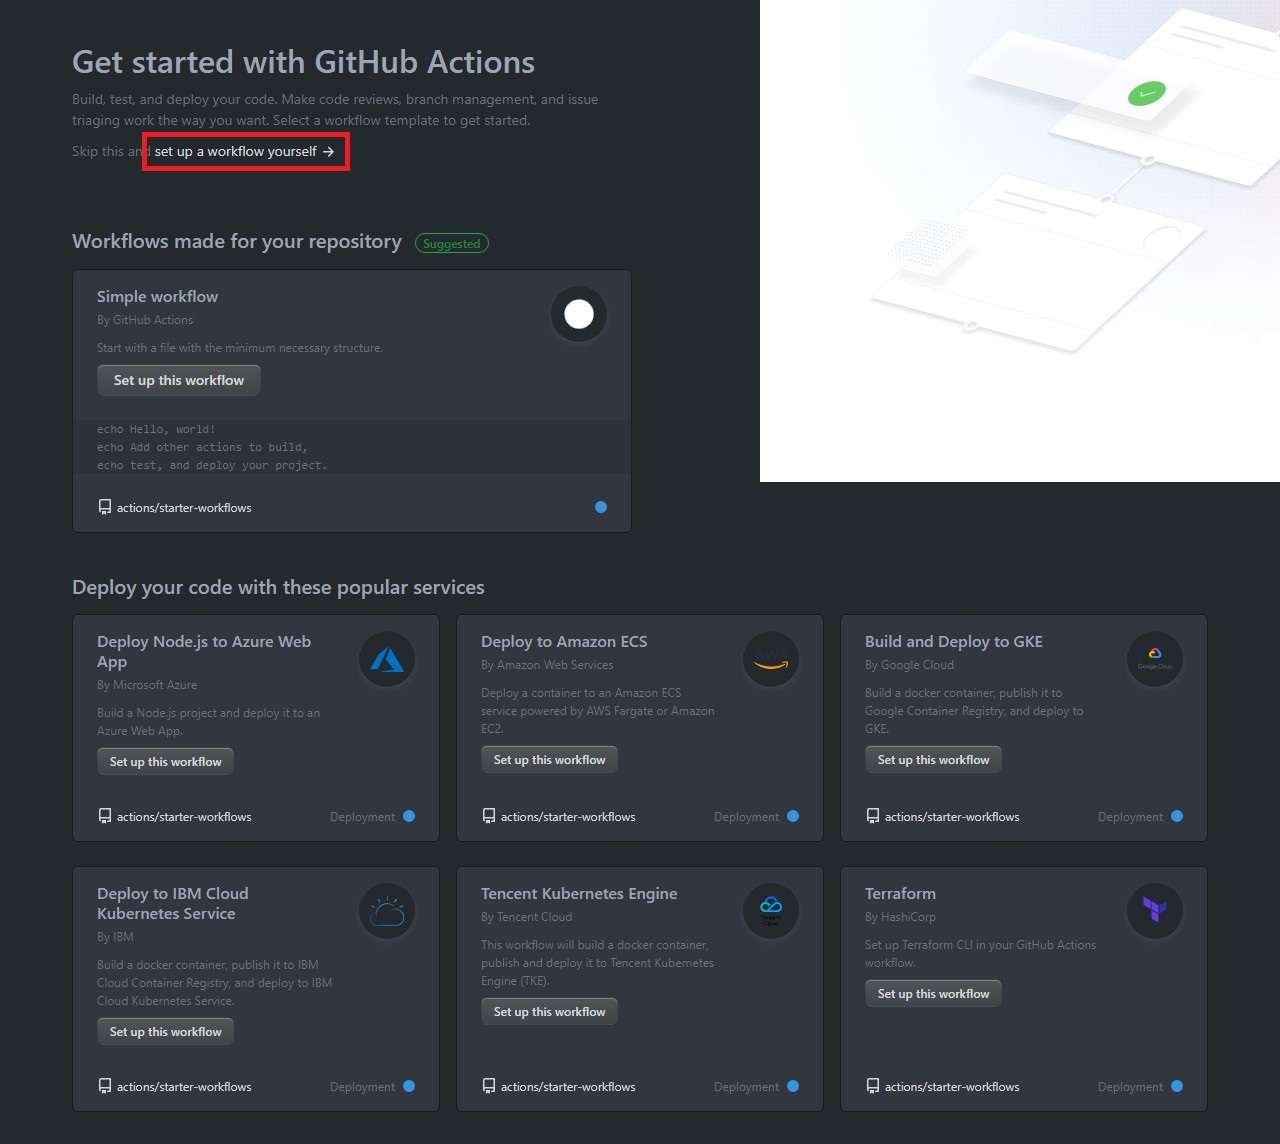 set up a workflow yourself 를 눌러 기본 workflow를 생성.
2. Unity activation file 생성
name: Acquire unity activation file

on:
  push:
    branches: [ master ]

    # Unity 버전 변경 시 아래 Job을 실행하도록 함
    # 최초 실행 시에는 아래 조건을 제거해야 Action이 실행됩니다
    # paths:
    #   - "ProjectSettings/ProjectVersion.txt"

env:
  # 사용하고 있는 Unity version
  unityVersion: 2019.3.13f1

jobs:
  activation:
    name: Request manual activation file 🔑
    runs-on: ubuntu-latest

    steps:
      # Request manual activation file
      - name: Request manual activation file
        id: getManualLicenseFile
        uses: webbertakken/unity-request-manual-activation-file@v1.1
        with:
          unityVersion: $

      # Upload artifact
      - name: Expose as artifact
        uses: actions/upload-artifact@v1
        with:
          name: $
          path: $
generate-unity-license.yml 를 생성 후 위의 내용을 붙여넣는다.
2. Unity activation file 업로드
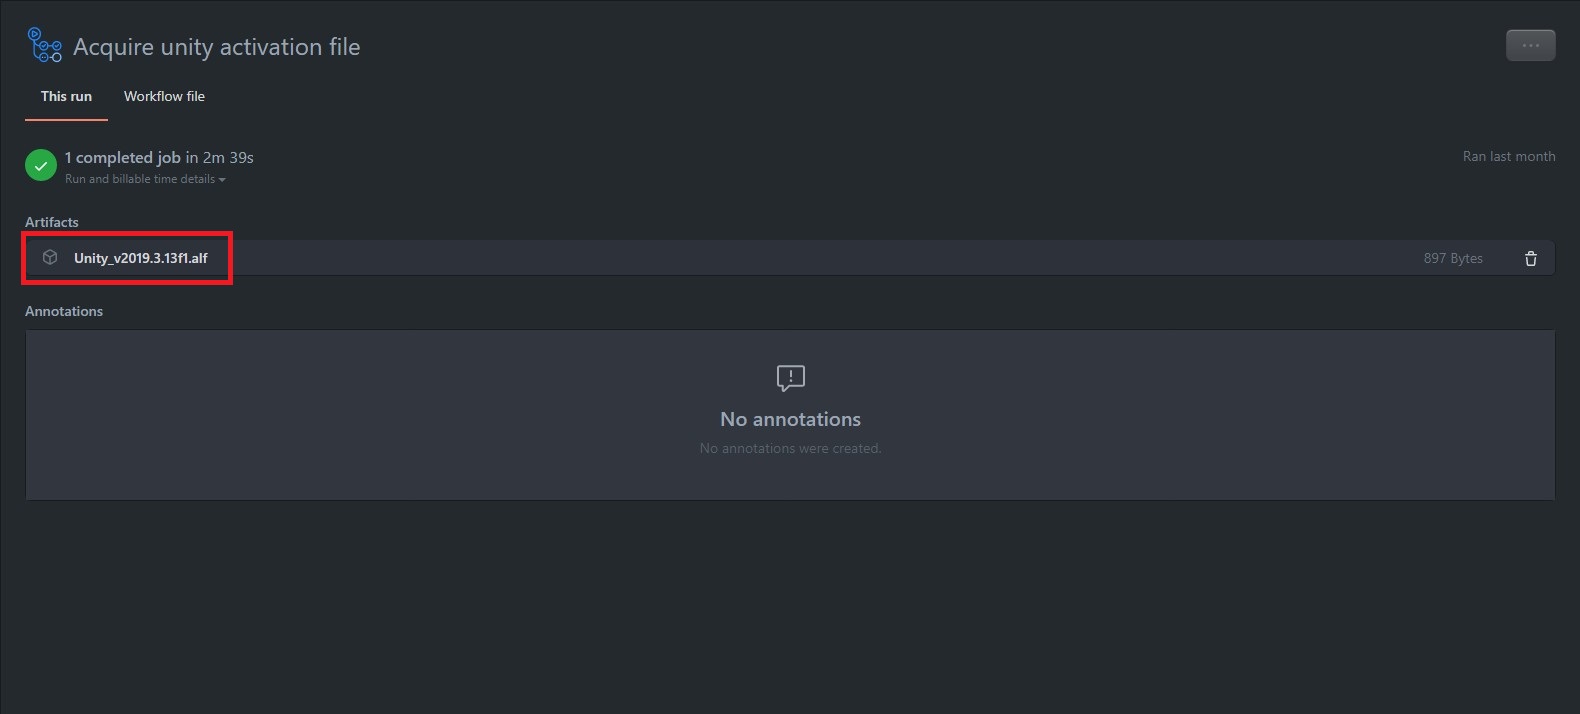 위와 같이 성공적으로 완료되었으면, 아티팩트를 다운로드 해 *.alf 파일을 여기에 업로드 해주고
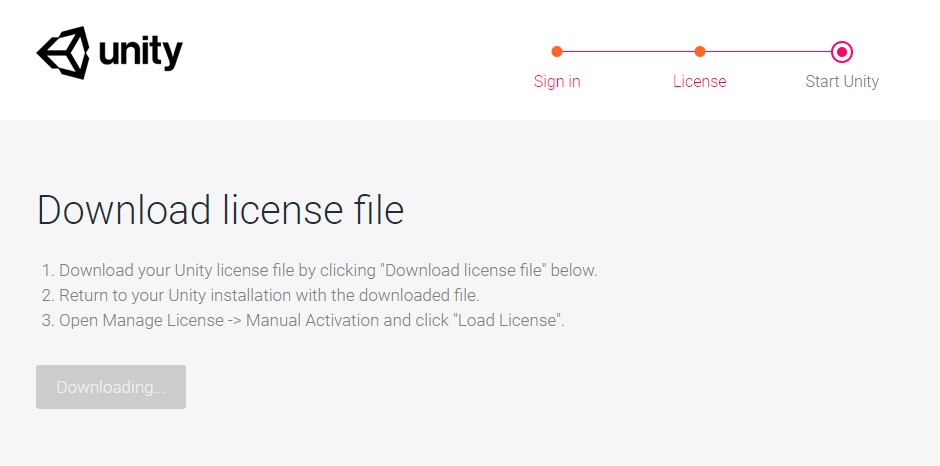 *.ulf 파일을 다운로드 받으면 된다
3. Secret 생성
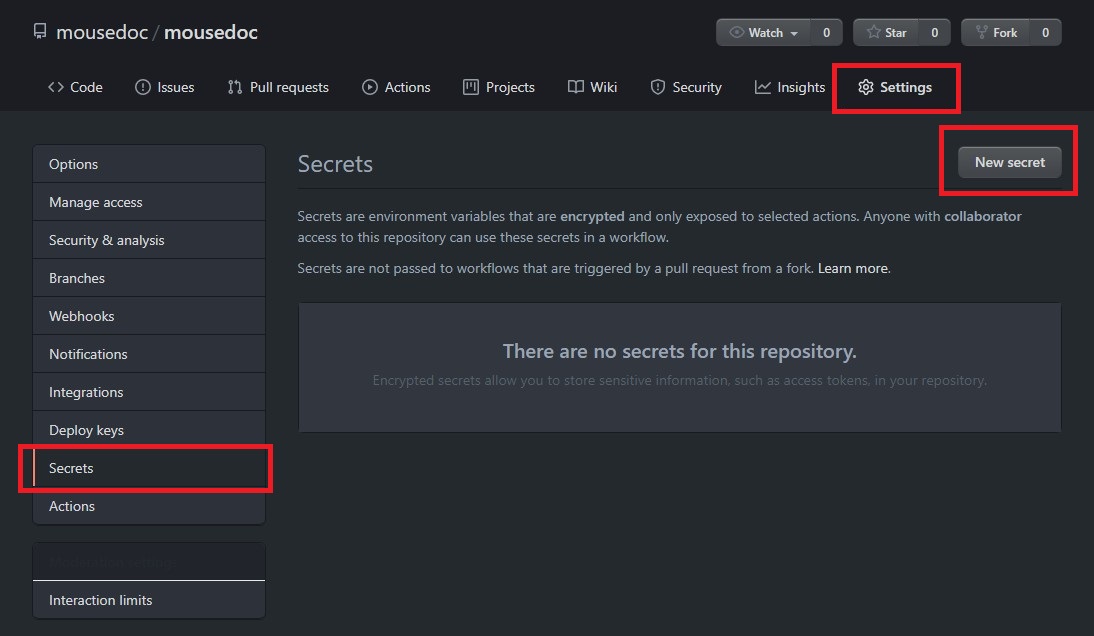 다시 Repository로 돌아와 Settings -> Secrets 의 New secret을 눌러준다
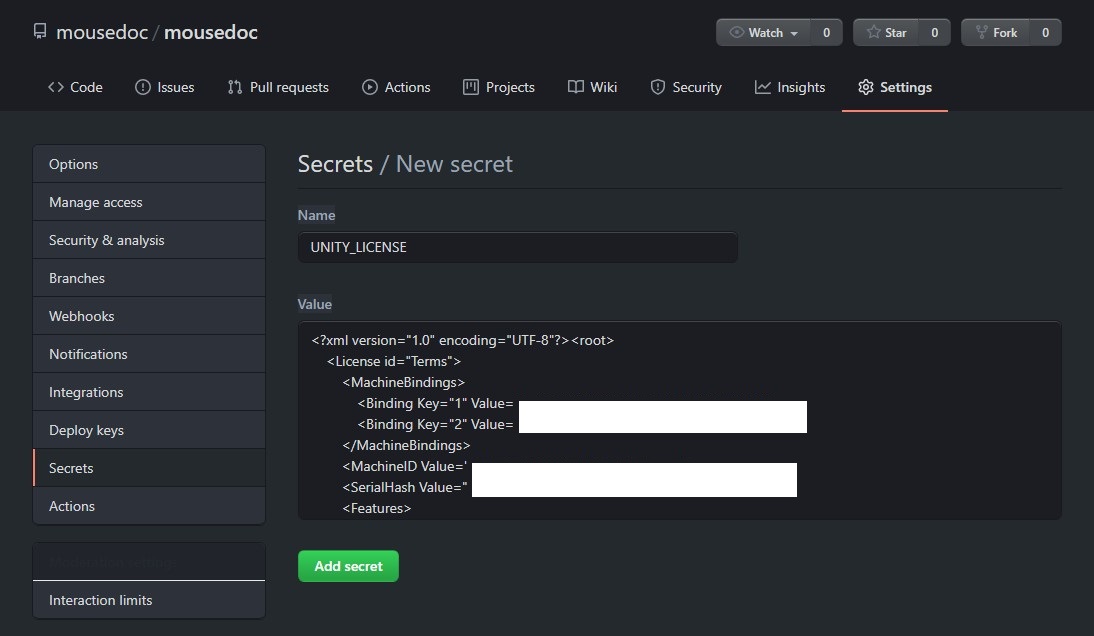 Name은 ‘UNITY_LICENSE’, Value는 *.ulf 파일을 메모장으로 열어 안의 내용을 복사해 넣어주면 된다.
4. TestRunner workflow 생성
name: Run Unity Testrunner

# Controls when the action will run. Triggers the workflow on push or pull request
# events but only for the master branch
on:
  push:
    branches: [ master ]
#  pull_request:
#    branches: [ master ]

env:
  UNITY_LICENSE: $

# A workflow run is made up of one or more jobs that can run sequentially or in parallel
jobs:
  runUnityTestrunner:

    # The type of runner that the job will run on
    runs-on: ubuntu-latest

    strategy:
      fail-fast: false
      matrix:
        # Unity project가 Root가 아니면 경로 입력
        projectPath:
          - ./
        # 사용중인 Unity version
        unityVersion:
          - 2019.3.13f1
        testMode:
          - playmode
          - editmode

    # Steps represent a sequence of tasks that will be executed as part of the job
    steps:

      # Checks-out your repository under $GITHUB_WORKSPACE, so your job can access it
      - uses: actions/checkout@v2
      with:
        lfs: true


      # Caching library folder
      - name: Cache Library Folder
        uses: actions/cache@v1.1.0
        with:
          path: $/Library
          key: Library-$
          restore-keys: |
            Library-

      # Run Unity Testrunner
      - name : Run Unity Testrunner
        uses: webbertakken/unity-test-runner@v1.4
        id: tests
        with:
          projectPath: $
          unityVersion: $
          testMode: $
          artifactsPath: $-artifacts

      # Upload result
      - name: Upload result
        uses: actions/upload-artifact@v1
        with:
          name: Test results for $
          path: $
run-unity-testrunner.yml 를 생성 후 위의 내용을 붙여넣고,
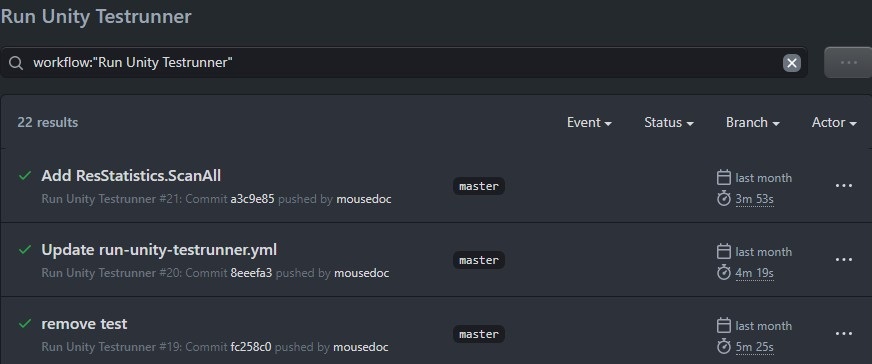
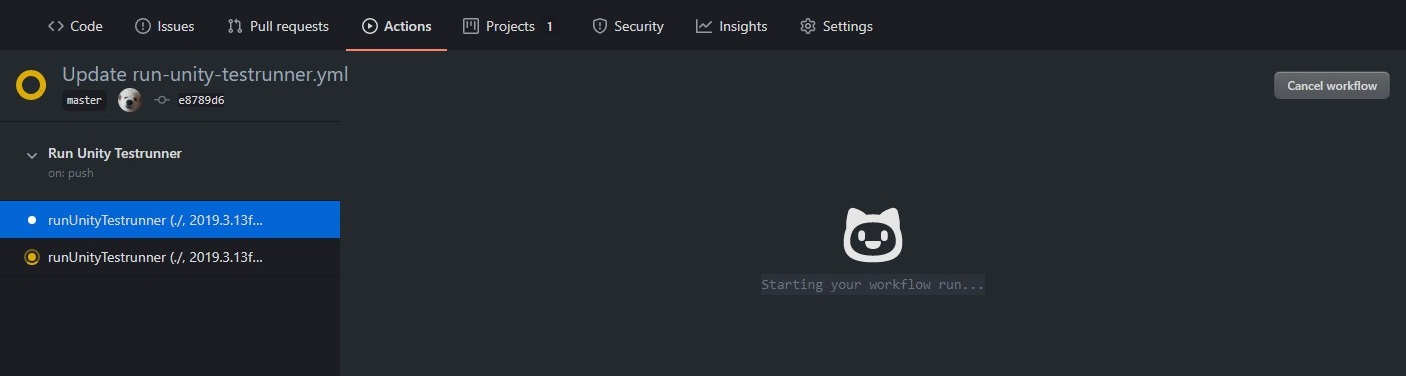 Workflow가 잘 실행되는지 확인하면 된다.
5. Result Artifacts 확인
Unity Test Runner가 정상적으로 실행이 되었다면. 아래와 같이 결과를 확인할 수 있다
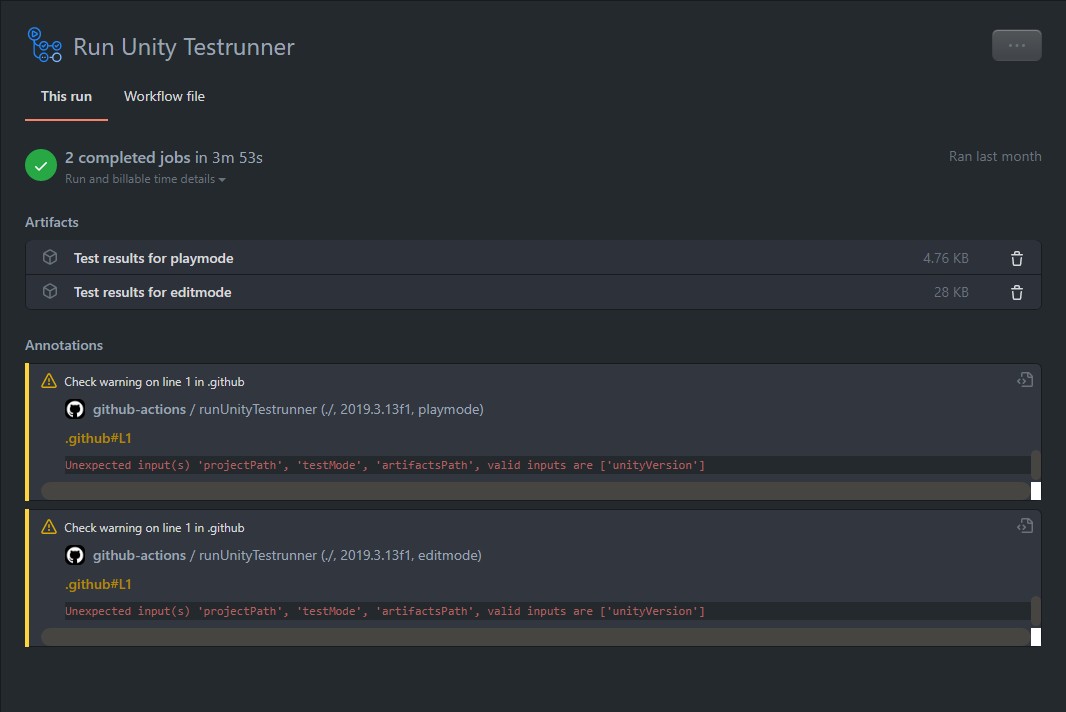 Artifacts를 다운받아 압축을 풀면 결과가 *.xml 형태로 저장되어 있다.
여담
같은 원리로 Github Action을 통해 Build를 하는것도 가능하다